
Next.js Server-Side Rendering Practical Example
On this issue, we will be talking about Next.js Server-Side Rendering, enabling high-performant websites by pre-rendering HTML.


Hello, my name is Igor and if by chance, you enjoy what I write, you may also like what I have to say on my Twitter profile, come and say 'Hi! 👋'.
This article is part of an entire Next.js series of articles I am putting together to help you become a Next.js pro and build blazing-fast React apps.
💡 If you don’t want to miss out on any of the tutorials, signup for my newsletter by clicking here or head over to DailyDev.io for more.
On this issue, we will be talking about Next.js Server-Side Rendering, complementing the last video on the pre-rendering topic.
So let’s get started!
Be sure to check out my previous articles on Next.js pages, Dynamic Routing, and Static Site Generation before continuing to better understand what we will be doing here.
Quick Recap
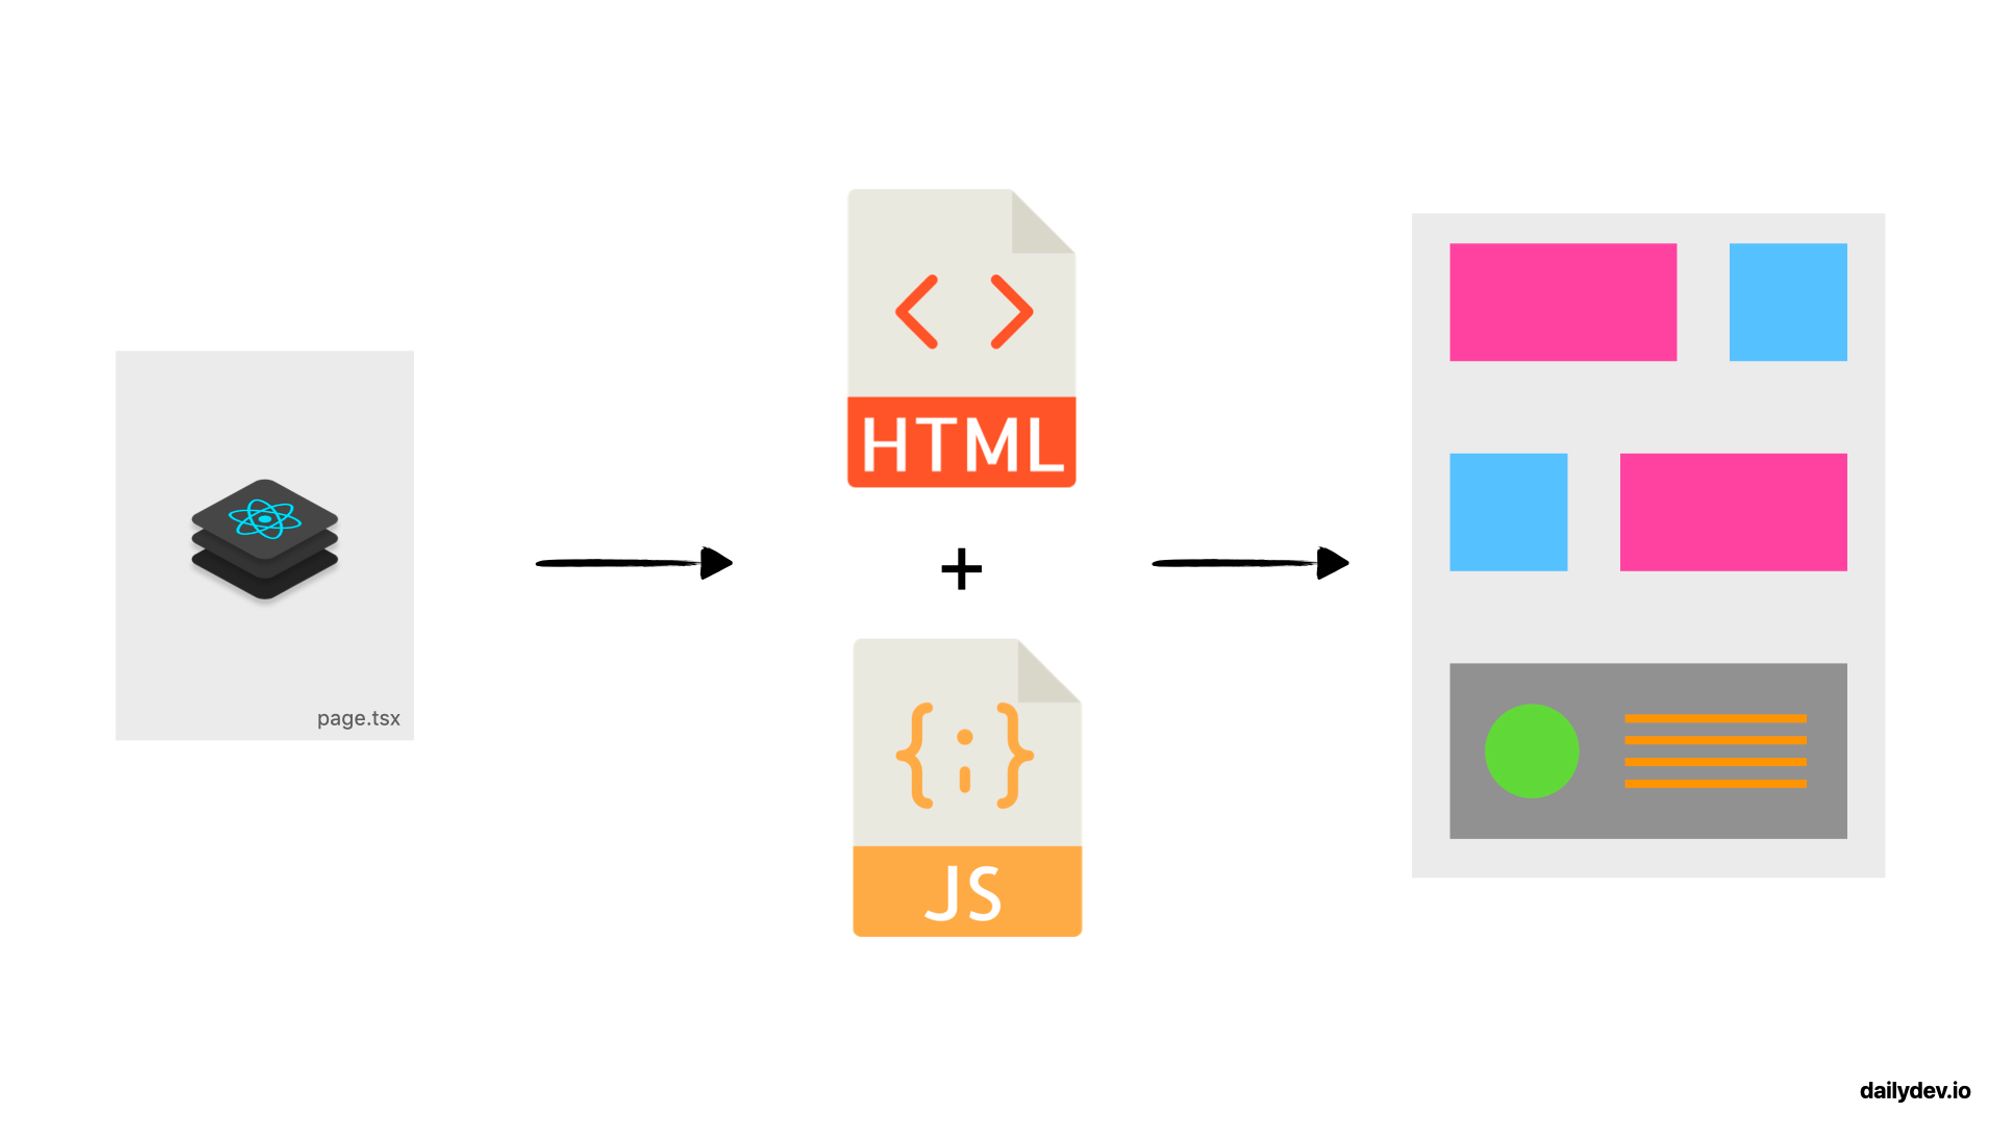
The last time we were here, we introduced the concept of pre-rendering, the default method that Next.js uses to render its pages, resulting in better performance and less effort for the client, by serving the client with a pre-built HTML file bundled with the necessary JavaScript file to make it work.
We discussed that Next.js presented two main ways of pre-rendering: Static Site Generation and Server-Side Rendering. That time, we covered the former and updated our upcoming dog-searching app to reap the benefits of that Next.js feature, and on this one, we will be learning something new.
Server-Side Rendering
Server-Side Rendering works on the same basis as Static Site Generation where the goal is to serve the client with a pre-built static HTML page that the server has pre-rendered and that is then hydrated by the bundled JavaScript file, restoring the page to its true interactive glory.
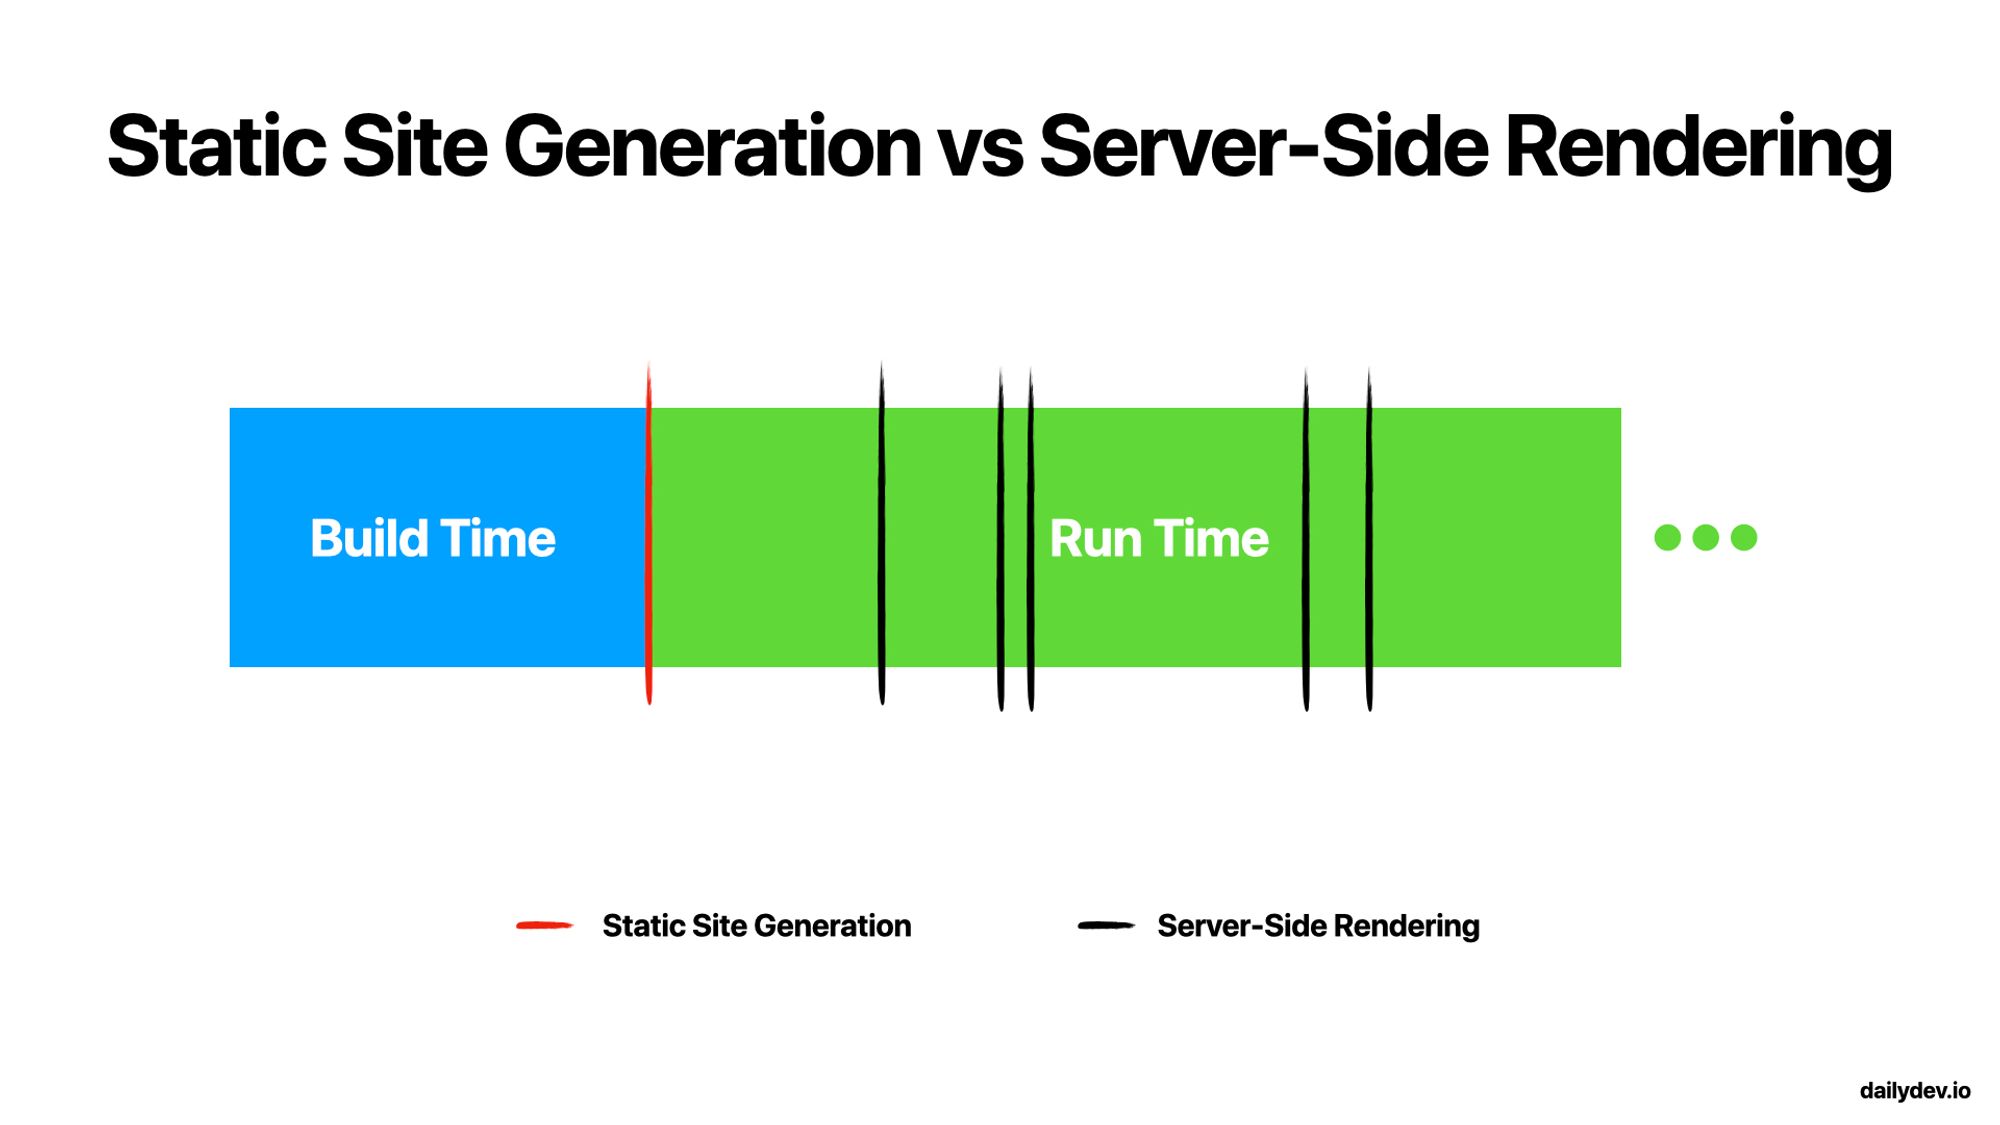
The main difference to retain between these two pre-rendering methods that Next.js ships with, is when the page’s HTML is pre-rendered.
Static Site-generated pages are pre-rendered at build time when the next build command is run. It is a case of generating and forgetting about them until a new build is necessary to reflect new changes.
On Server-Side-generated pages, however, the page’s HTML is generated on each request to the server. This means that the same page is rendered multiple times along the application’s lifetime. As many as it is requested (unless we use caching, more on that later).
As you can see, server-side rendered pages will be less performant than statically generated ones and cannot be stored on a CDN for faster global access.
However, sometimes Server-Side Rendering may be the only option. The main reason you might be looking into using Server-Side Rendering over Static Site Generation when creating a page is if that page needs to pre-render frequently updated data that must be fetched from some external data source and can’t, therefore, be statically generated at build time as it needs to always be up-to-date.
How to Use It
Unless we specify that a page is to be either server-side rendered or statically rendered with data (check the previous article), Next.js won’t be able to tell the difference.
To do this, Next.js allows us to define specific methods within our page’s components that it will then evaluate and assess whether each page is to be pre-rendered at build time or on each request.
Previously, we discussed the Static Site Generation-specific methods and Server-Side Rendering is no different.
To use Server-Side Rendering for a page, we export an async function named getServerSideProps from our page’s React Component. This is the function that the Next.js server will call on every request to this page.
This function will feed any data that we wish into our page component through its props, by having a very specific return type.
And just like that, our page became server-side rendered and will always be up-to-date every time it is requested! 😎
Updating our Dog App
Now let’s create a server-side rendered page within our Doggo App to see it in action.
For the purpose of this tutorial, we will create a page that will display a dog carousel whose data will be coming from the server every time we request that page.
Creating our New Page
Let’s create a new file under the /pages/dogs directory called carousel.tsx.
Export a new React Component called Carousel that will receive a data object as component props that are typed with an array of our Dog interface created in the last article (check /definitions/dogs.d.ts).
Render some HTML in it and your component should look something like this:
Making it Server-Side Rendered
Now let’s add the magical function that makes this a server-side rendered page, the getServerSideProps function.
This function will fetch all dogs in our in-memory database that we created as a TypeScript file exporting an array (check /db/dogs.ts, we also added a few more entries for this tutorial), and return them as a randomly sorted list so that our newly created component can use it to create a “frequently” updated carousel.
Our function should be something similar to this:
Rendering the Data
Now that we have our component receiving data, we can take it and do whatever we please with it.
I’ll be creating a two-column grid and inside it, we go through each item on our data prop (that we know is a Dog) and we render their name and description on the screen. Of course, we also add some CSS just so that this doesn’t become a hot mess of HTML. 😉
Maybe something like this:
Final Result
So by the end, the page that can be found under /dogs/carousel should look something like this and be updated each time we request it with data fetched by the server. Cool! 😎
.gif?table=block&id=0348217a-5fa3-448a-a498-b27de1cc8322&spaceId=a1132038-30f4-4c02-8dbb-44ea7cf0c715&userId=&cache=v2)
Final Remarks
To experience the differences between Static Site Generation and Server-Side Rendering, don’t forget to run the build command (npm run build) followed by serving (npm run start) the generated files. This is how the pages would be served in a production environment and cached by some CDN.
Running the project in npm run dev mode will always build all pages on each request, running all specific pre-rendering functions on all requests.
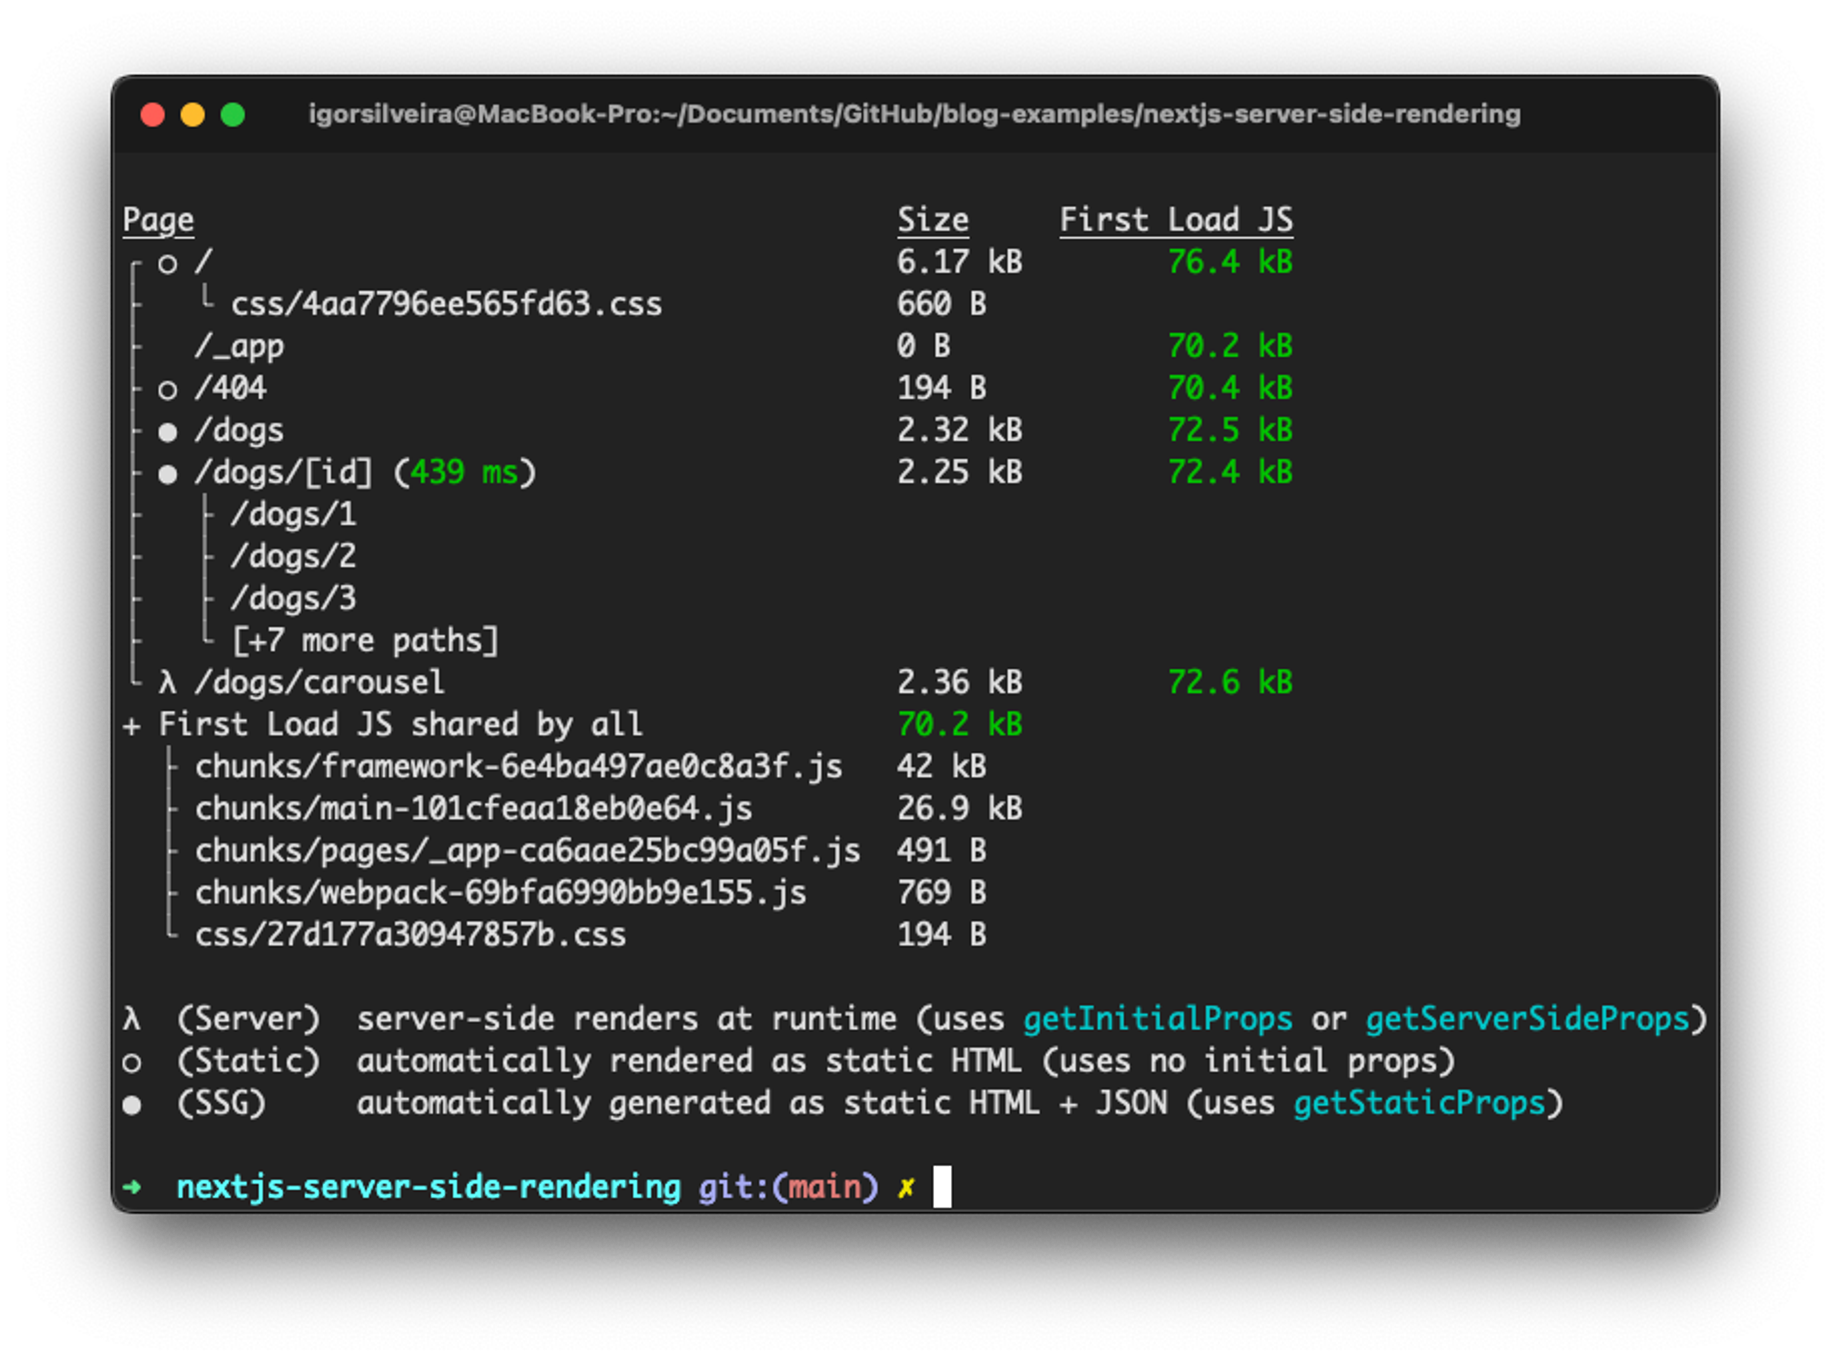
Notice how Next.js detected which pages were static or server-side rendered.
If you run into any trouble feel free to reach out to me on Twitter, my DMs are always open.
Next Steps: Keep an eye out for my following Next.js tutorials where we will go over much more in Next.js territory! If you don’t want to miss out on any of the tutorials, signup for my newsletter by clicking here.